So my hair's been weighing me down lately. It's been more than a year since it's been cut professionally. I've been complaining to my husband about how long my hair has gotten, how gross it is that it sheds all over the house, and how it's been making me feel unkempt. I know getting a hair cut isn't in our budget (not only that, but last time I did pay a professional hair dresser to cut my hair, she talked me out of what I wanted and gave me a haircut I didn't like) and had mentioned to my husband that I was going to YouTube how to cut my own hair (I've done it before - see here!). When mentioning it to a friend of mine, she said something like, "Yeah, if you put it in a ponytail and cut it you'll get layers." I was willing to test this hair styling theory out. My husband encouraged me to finally do it: he called me from work right before his lunch break to tell me that he'd find a YouTube video and help me cut my hair. Isn't that sweet? So later that evening after he got home from work, we searched YouTube and found this video and here are the results:
I thought cutting my hair in the shower would help the clean up after the cut go more quickly. So I shampooed and conditioned my hair - realized that I needed to towel-dry my hair a bit - bent over and brushed my hair into a ponytail on the top of my head, slid my hair tie down to where I wanted to cut my hair, did a test run with a small pair of hair clippers at the thin ends of my hair and realized that pair wasn't going to cut it, so I called for my husband to get me my fabric scissors. If the lady in the video could use a pair of regular scissors, then I guess I could too! My husband did end up cutting my hair for me. I could have done it myself, but he wanted to help so I let him. Plus he's less of a perfectionist than I am. He cut my quarter to a half dollar thick ponytail under my hair tie into a little trash can outside our tub and it was done! I decided to shampoo and condition my hair again and did not expect to see what I did in the bathroom mirror! When Gregg cut my hair it looked like one big fat chopped off chunk, but it really does work! The ponytail cut does layer your hair! I got a beautiful, thinned out, layered cut for free! And just by showering in the evening and letting my hair dry in a bun overnight, I get these fun, bouncy curls!
Here are my girls getting into my photo shoot this morning [laughs].
If you just like your layers in the front and only like about 2 to 3, then this hair cut probably isn't for you. It appears that this hair cut works for both thin, straight hair (the hair type the lady in the video appears to have) and thick, wavy hair (the type I have).
Edit: To be safe, slide your elastic hair band almost to the end of your ponytail because if you cut off too much, your top layers are going to be really short! There's also a tip posted under the video: "TIP: if you're really wanting to hack quite a lot off, start your ponytail further up your head rather than at your forehead, that way you won't end up with very short bits at the front."
I feel confident now that when it comes time, I will be able to give Leala her first hair cut with success! I am also inspired to follow other YouTube videos for future hair styles.
Well it was a busy December working on several Christmas projects. I made an asserted effort to have a stress-free holiday season. I was so excited about the handmade things I had planned to give to family and friends and I didn't want to lose the cheerfulness of it (see 2 Corinthians 9:7). I was also trying to trust that God would give me the time I needed to finish my projects since I had honored my husband by not starting on them until he was done with his school semester about 2 1/2 weeks into December as he had requested. I will say though, after several late nights working to get things done, I understood why people start planning for Christmas in November. I think I will do that next year.
This tinsel wreath was just something fun. A lady from my Bible study group gave me some Christmas decorations including this tinsel so I thought I'd put it to some good use.
I saw this wreath on Bleubird Vintage's blog and had planned to make something like it. I never had the time to put a word on my wreath. Before I pack the Christmas decorations away, I want to shape the word "peace" out of some black wire I have and wrap strips of scrap fabric around it. I've heard the Christmas story so many times, but this year the part that says, "Glory to God in the highest, and on earth, peace and good will toward men," (Luke 2:14) came to mind and really stuck with me. For my wreath, I wrapped the tinsel around a wire hanger I grabbed from our closet.
Click on Image for Full-Size
A friend of ours offered to take some pictures of our family but wasn't able to shoot them until mid December because Gregg had finals and had to also meet a couple Ph. D program application deadlines. I had in my mind that if we didn't get the pictures done in time to use them for Christmas cards, I could order New Years cards instead. So these handmade cards were my Plan B. I used a bunch of "Thank You" cards I had left over that I had ordered for my wedding more than 4 years ago, and got the angel and blue velvet ribbon images from The Graphics Fairy and the "Hark the Herald Angels Sing" sheet music off of Google Images. I added a little shine with gold and blue gel pens.
I got this tutorial for Cinnamon Ornaments emailed to me. My Bible study co-leader also gave me a little different variation of this recipe which you can find here (recipe at the bottom of the page). When Kristen blogged that the dough shouldn't be sticky, I have no idea what she was talking about. I let the dough stand for an hour and followed the recipe and it was super sticky! I ended up seriously kneading my dough quarters in lots of cinnamon, as pictured above in the black plate. I also found the thicker my dough, the easier it was to tap it out of my cookie cutters. Metal cookie cutters were suggested as working the best. But other than that, these were fun to make and bake and they sure do smell good! I'm planning on making more to use as decor around the house and as future gifts. As pictured above, I decided to make monogram ornaments for different families. The letters with the heart represent the couples and the letters below represent their children. I thought a tradition could be started where the kids get to take their letter ornament with them when they move out and when they get married, I could make them a heart ornament with the letter that represents their spouse's name and then make more letter ornaments as gifts when they have children.
So this year we literally had no Christmas budget. But that didn't discourage us from having presents for Leala to open. We got creative and came up with gifts we could make her for free. Gregg thought it would be nice for Leala to have her own chair since she likes climbing into her old one that she's too heavy for now and that we need to use for her younger sister, Adella. I have to admit, that when Gregg told me his idea for making Leala a chair out of cardboard, I couldn't imagine how that would work well. But when he started showing me pictures of his progress from a co-worker's phone, I was impressed! He accomplished it with just cardboard filled with paper and some duct tape. We remembered that we had some black furry fabric in our closet that we were going to use to make a dash board mat for my car years ago. It worked very well for a chair cover!
It was so fun staying up a few late nights with Gregg, busily piecing together and sewing up Leala's presents. We had experienced so much joy making her gifts that it didn't bother me this year that Gregg and I couldn't buy each other presents (though we did end up getting blessed with Christmas cash from some friends and family). It truly did feel more blessed to give than to receive this year!
With all the other Christmas projects I had to get done, I only had time to make Leala these bracelets. I guess I'll save the necklaces for next year. I used this tutorial to make the felt flowers on the pink and yellow bracelets. I used the embellishments to cover up my stitches. These really are super easy to make! Because I didn't have wide enough elastic (the 1/8" stuff I had was a nightmare to work with and I did have a little melt down about the project not working), Gregg did let me go to JoAnn's to buy the elastic I needed which only ended up costing $1.50 for a yard (I ended up getting 3/4" for Leala instead of the 1" used in the tutorial). And the felt was from a 14-sheet package I had bought at the Dollar Tree to make a princess crown for a 4-year-old girl's birthday present for the Build-a-Bear birthday party me and the girls were invited to earlier this month. So technically the Christmas present I made Leala wasn't completely free, but pretty darn affordable!
I know when money's tight, people can get discouraged thinking they can't celebrate Christmas (at least the consumer American way). But with a little resourcefulness and creativity it is possible to have something to give.
Three more Sundays until Christmas! [laughs] Put that way, it makes it seem like there's not much time to get things done. Okay, don't panic. How does 21 days until Christmas sound? Much better? Alright, you can relax now. I, myself, have been trying not to worry about the list of handmade projects I've given myself to do before Christmas. Aside from hoping I'll get what I have planned done on time, I've been REALLY excited this Christmas season about all the ideas I have for giving people stuff, from the gift ideas I have for my girls to all the Christmas cards I hope to send out ('cause I know how happy I get when I get a card in the mail). And then there's the free stuff I get to share with you all including some of the songs that are on my iTunes Christmas playlist and links to tutorials for handmade gifts and Christmas cards, contests, and a couple places in town to see Christmas light displays. I hope what I have to share makes your holiday a little more merry and bright. =D
Jolly Jingles
If you're already tired of hearing Taylor Swift mournfully sing for the thousandth time about her heart being given away last Christmas, then here are a few tunes you may be less familiar with or renditions you can rock out to (maybe around the Christmas tree). Enjoy!
Handmade Gift Ideas for Leala
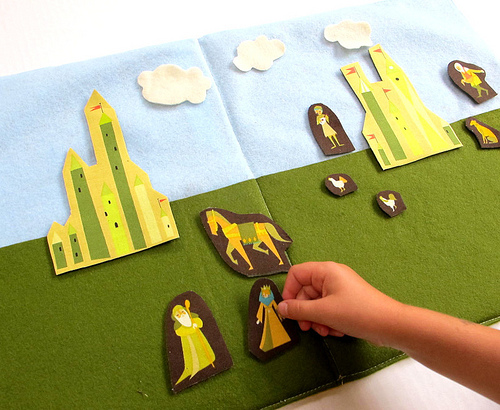
As I had mentioned in my post Privation is the Mother of Creation, there was a list of gift ideas I had for Leala that I could make for free with the fabric scraps and materials I have in my sewing stash. Due to a limited amount of time though, I narrowed the handmade projects to these bracelets, this necklace, and maybe these too. Then, after watching Leala have fun playing with her Ikea puppets yesterday, I remembered a post I had seen on a mom's blog about a puppet theatre she made for her kids. Oh my goodness, was this link hard to find! NEVER again will I neglect to bookmark something I like! So I hope to make a similar little puppet theatre for Leala for Christmas... and even more so because back in June, my husband was having fun making Leala laugh by making her hand puppet eat her finger puppets and spit them back out in her face, and now she thinks that's how you're supposed to play with them. A little puppet theatre may help teach her a more constructive way to play with her puppets [laughs].
If I have the time, I would like to make some flower headbands for Adella because one, I think they'd be cute, and two, maybe then people wouldn't ask us if she's a boy. I liked this tutorial.
Crafty Christmas Cards
I signed up for Parent Magazine's 100 Days of Holidays email newsletter and this update caught my attention. My favorite handmade Christmas card designs were the ones with the stitched border and sheet music background. I came up with a design that combines the two. I'll post pictures when I complete one.
Giving-It-Away-For-Free Business
You know where I got that title from if you've seen Veggie Tales: St. Nicholas: A Story of Joyful Giving. You'll often hear me quote movies. Well, speaking of giving away stuff, here are a couple Christmas contests I know of where you can win free stuff:
Anthropology: 20 Days A'Gifting
Sorry I didn't get this link up in time for you to enter the contest when it started on the 2nd. BUT, better later than never and you still have 18 chances to enter to win 18 different prizes (1 entry per day).
Parents Magazine Weekly Toy Giveaway
I just found out about this contest yesterday, BUT there are still 3 weeks left to enter to win 3 different prizes (1 entry per week). Here are the weeks that are left and their corresponding prizes:
Week 3: 12/4/11-12/10/11
One (1) winner will receive a Stow & Go Activity Cart, retail value $85.
Week 4: 12/11/11-12/17/11 One (1) winner will receive a Grow & Play toy package, including one (1) Start Me Up! Car Keys, retail value $15; one (1) Fun with Food! ABC Blocks, retail value $30; and one (1) Busy Hands Bear, retail value $27; total retail value of Grow & Play package $72.
Week 5: 12/18/11-12/24/11 One (1) winner will receive a Rhythm Music toy package, including one (1) Colorful Notes Xylophone, retail value $28; one (1) Beat Bop Drum, retail value $30; and one (1) Clickity Clack Bugs, retail value $12; total retail value of Grow & Play package $70.
Deck the Halls
I still have some decorating left to do in our house. I've only managed to get my interchangeable bulletin board decorated with some of my favorite greeting cards from Christmas past and a few ornaments and a pine cone garlandthat I strung with colored lights and hung red balls and a few of my mom's handmade felt ornaments on. I LOVED the white Christmas light decor in Dave Barne's Christmas Tonight music video. Maybe it'll spark some creative ideas I can implement in our home.
As I mentioned in my post, Thankful [Part 1], I was glad to see that people actually take the time to celebrate Thanksgiving and don't ignore it in light of the Christmas craze. Just today, when I went to our bank to deposit a check, I was pleasantly surprised to see that each bank teller's counter was decorated with gourds of different colors and sizes. And as I was leaving, I noticed that strings of orange and purple lights were hanging from the front desk, intertwined with a tinsel fall leaf garland. Now that's what I'm talkin' about! And it was so refreshing on Monday night, when I went to the house that hosts our Mom Heart Group (inspired by Sally Clarkson), to see fall leaf decorations up on the kitchen wall and a homemade sewn "Give Thanks" fabric garland hanging from the fireplace mantel.
Check out these great Thanksgiving garland ideas (and a kindred spirit who has found creative ways to not overlook this important holiday)!
I've discovered that this bulletin board has been an inexpensive, interchangeable way to decorate! I love looking at this Fall collage from the dining room table when I sit down with my family for our meals. It's made up of old greeting cards that I keep in a box, favorite verses I've jotted down on index cards over the years, and freshly picked Fall leaves from outside.
One of the cards in the collage is actually a new one we received in the mail this month from the sweet Seniors group from our church. I really liked this quote in it:
"The most important ingredient for happiness is not fortunate circumstances or great possessions, but a heart that knows how to be grateful. Gratefulness is the root of contentment and peace."
{Scott Walker}
It reminds me of the "Happiness vs. Joy" sermon our pastor just taught on Sunday from his "Key to Unlocking Joy" series.
Alright, so here are more things I'm thankful for for each day of November from the last list I posted on the 11th.
12. 75 FREE prints from Shutterfly!
13. This Advent calender idea. I seriously was just thinking yesterday about what I could do with old toilet paper and paper towel rolls. I want to implement this idea for making a Thanksgiving Advent calendar for next year. I think it would be cool for my family to write down what we're each thankful for every day, put those scraps of paper in the numbered pocket for that day, and then on Thanksgiving, take all the pieces of paper out and read them. Maybe to make it more fun, we could put quotes we find about being thankful in the pockets too!
14. FINALLY getting to check out this book! A lady from my Bible study group earlier this year mentioned it and said the pastor from the church my family used to go to, highly recommended it. The subject of Heaven has always made me curious. And I figure since I'm going to spend an infinite amount of my existence there compared to Earth, why wouldn't I learn as much as I could about it? So anyway, I've tried checking this book out from the library since the summer, but apparently it's a hot item! Well, my patience paid off (and particularly since I made myself not buy a copy and waited until it was available to borrow)! By the way, this video about Colton Burpo brought tears to my eyes (the good kind).
15. Getting a Ribbon gift card from Gregg's work! We get to pick a gift from the Ribbon gift catalog and this Safety 1st Sounds 'n' Lights Activity Walker is what I think Gregg and I agreed upon. Adella seems like she is going to be quite an active one when she's able to start walking, so we think this will be a great way for her to get around and yet contain her enough so that I'll be free to get things done around the house.
16. Getting the idea to make a "Sleepy Sounds" CD. So one of my top picks from the Ribbon gift catalog was a First Years Sounds for Silence machine. What I liked about this Premium one was that it included a MP3 player connection cable. Talking it over with Gregg, he suggested that I just find some white noise audio I could download online and make my own CD to play in Leala's room on our CD player. So I went on iTunes and was surprised that there are whole CD's of just white noise and nature sounds. So I purchased one of rain and then got some cool lullaby renditions of some of my favorite songs from artists like Johnny Cash, Third Day, Jars of Clay, and Chris Tomlin!
17. Finding a couple recipes online so I can start making my own blended frappes (I'll tell you how that goes in a future post with links to the recipes if I end up liking them).
18. My dad being available and willing to watch Leala for me the past few weeks so it was easier to go to each of the girl's doctor's appointments and mine.
The last few days, the creative wheels in my head have been spinnin'! You know the saying, "Necessity is the mother of invention?" Well I have one: "Privation is the mother of creation." I have this list in my head that keeps growing of the things I notice Leala likes (Christmas gift ideas) and of the ways I want to decorate and organize her room so it's more inviting and functional (I started before Adella was born but didn't get a chance to finish). I automatically think these things require spending money, which we don't have the budget for, but then I remember that I have a sewing machine and lots of material that was given to me.
So this year for Halloween, I was inspired to do my girls' costumes the old school way; hand make them. The hand-me-down overall dress Leala got recently sparked the first idea. It reminded me of the little outfit the character, Agnes, wears in the movie Despicable Me, so I decided it would be easiest to dress Leala up as her. Plus, Despicable Me, has been our family's movie of the year. Ever since we saw it with friends for New Year's, Leala has wanted to watch our copy of it over and over and over again. Before she turned 2, Leala's first full sentence was, "Woah, woah, woah - what is that?!," from one of Gru's lines. Then our friends who introduced us to the movie in the first place, got Leala a "Fluffy" unicorn from Universal Studios for her 2nd birthday. So it seemed like fun to go with the reoccurring Despicable Me theme of the year. From there, somehow I got the idea to dress Adella up as a unicorn to match Leala.
For Leala's dress, I got a couple pieces of scrap fabric and stamped a part of the song Agnes sings when her and her sisters wander into Gru's "secret lab". I cut the heart out of a piece of red felt and hand sewed it on the patch. The patches I machine sewed on to the dress with a zig zag stitch to keep the fabric from fraying. The little unicorn came from a McDonald's Happy Meal. The two front hooves have a velcrow closure, but I hand sewed them together with a little stitch for reinforcement. If Leala ever got annoyed with the unicorn, I could just slide it off the overall strap, but she never did.
I Googled "baby beanie" and came across this tutorial for a DIY reversible baby bonnet. I shrunk the pattern to fit an 8"x11" size page with a 0.5" margin all the way around and it just so happened to print out as the right size for my 3-week-old baby. I took the ruffle concept that was used on Quinn's bonnet on the front to make my pink unicorn hair. I Googled how to sew a unicorn horn and found out it was a half circle, so I used the pattern part for the back of the bonnet for my horn. To get the horn to stick straight up, I had to pack it as full as I could with stuffing and then hand sew it to the bonnet because the base of the horn was too big for the foot of my sewing machine to sew over. I used an animal child's hat pattern online to figure out how to draw a pattern for my own ears and a horse stuffed animal we have. It wasn't until I sewed the pink lining to one of my ears that I discovered they were too small, so I drew a bigger ear pattern that ended up working. I totally chanced it when I cut a couple slits in the top of the bonnet to attach my ears, but it worked! And I ended up saving time on the chin strap by finding a piece of ribbon that was already finished on the edges. It was so great finding the right scraps of fabric and the buttons I needed in my sewing stash.
What was wonderful about these costumes was that they were warm. I noticed last year, when we were out at our church's Harvest Celebration, that it was cold outside. Leala wore a cute Snow White dress, but it ended up having to be covered up with a jacket. So I kept that in mind this year.
Leala was such an excited ball of energy, it was hard to get a good picture of her in her costume. The one I was able to take in the house before we left was the best one I could get. If you've never seen Despicable Me, then you have to at least watch this video of the "Best of Agnes."
Leala was still a little too young to understand how to play the games our church had at our annual Harvest Celebration, but I think she was good with just the balloon she got. She did also enjoy a couple pieces of chocolate, a little lollipop, a glow-in-the-dark bracelet she won, some popcorn, a few bites of a BBQ hot dog, and a visit with a black lab.
I was so proud of Gregg for working hard all weekend to get his school work done so we could spend this time together as a family. Not only that, but he was running on about 4 hours of sleep. And I thought it was so cute how proud Gregg was of me for making Adella's unicorn hat. He kept telling everyone that I handmade it. We all had a good time and I think special memories were created.
About a couple months ago I shared about the amazing book I discovered in The Anthropologie Experience post. How to Sew a Button has been a very helpful and humorous book and I thought I'd share a couple things I've tried from it so far.
How to Make Blueberry Pancakes
{p. 3-4}
So the first time I tried this recipe, I didn't have any blueberries, so I threw in chocolate chips instead. Oh my, are these the best pancakes I've ever had, made from scratch! They are so fluffy! The second time I made this recipe I did have blueberries and they were the biggest ones I've ever seen! I guess I've only seen fake little blueberry pellets in blueberry muffin mixes or canned ones that have shrunk. Honestly, the fresh blueberries were a little too big for me and I didn't care for them too much. Plus they stained Leala's clothes which I'll get to. But they were made as a special treat for my husband and he liked them.
This is the pancake recipe I'm going to use unless I find a better one, substituting the blueberries for chocolate chips, 'cause that's the way my grandmother made them and that's how we like it! View the recipe here when you "LOOK INSIDE!" the book on Amazon.com and click on the "First Pages" link.
How to Remove Berry Stains
{p. 113}
When I think Leala's meal is going to be messy, I'll take her clothes off to protect them even though most of them are hand-me-downs, but really cute ones. This was one such cute hand-me-down and when I saw the blueberry juice that dripped on her top I was mad at myself for not knowing better. In the back of my head I thought I remembered berry stains having the potential of being permanent. That's when I remembered that there was a section in How to Sew a Button on how to remove stains. So I tried it. I spread the top over a bucket, boiled some water on the stove, and poured it at about what I thought was a foot over the stain. I didn't have a kettle, so I will say that pouring boiling water from a pot got pretty messy. I had to use the handle of the bucket too to help hold the garment in place.
If you click on the image above to see a larger view, you'll notice that the berry stain didn't come completely out. However, this method got the stain mostly out. Spraying the stains (there were three different spots) with stain remover and running the garment through the washing machine I hoped would take the stains completely out.
And how pleasantly surprised I was when I pulled the top out of the dryer to find it looking like new... well, except it needing to be ironed. =P
How to Curl Your Hair Without Heat
Did your grandmother know how to do this?! While I was blog browsing, I found this tutorial on how to curl your hair with just an elastic headband on Soul Singing Liv's blog. Since I didn't have a hairband, I just grabbed a piece of elastic from my sewing stash, cut it to the length that would fit around my head, and tied it off. My husband said it looked like a real headband with a cute little bow on it. As was suggested on both the video and the blog for those with thick hair, I let my hair dry almost completely before tucking it in around the elastic hairband.
As Olivia mentioned in her post, "The key to smooth curls that will last all day is PRODUCT." However, for our budget, hair styling products are considered an extra, so I didn't get the tight curls the lady in the video and Olivia got. But the elastic hairband method did make my hair curly and since I have naturally oily skin, I didn't need to use a hair product to take the frizz out of my curls. I could maybe use something to tame my fly away frizz in the front though. =P
Q. What have you learned from your grandmothers?
(Please post your answers in a comment below.)
![A Field[s] Day](https://blogger.googleusercontent.com/img/b/R29vZ2xl/AVvXsEhf18EGXS9I2hwJ1sc2VFM2-NZwk0VvqqRKKKmrx_CI9ZtdZKw9UQguR-SiZMzMeNZMLtYh3E9fPPOQQQg7hSO92425f7yjb5lDPc5EvEkTWMzNKS3240-RLKSl4KbzGLaP3HsKk1ENKH4/s900/blog_header.jpg)